We start monday at 12:00 GTM and there are 7 days to finish the joints.
Rules:
No electric tools.
Document the process.
Document the tools used.
Time it.
Discuss it.
Blog it.
I will post only the drawings of the joint, no indication whatsoever how to make the layout or the cutting order, we need to find out by ourselves.
If we manage to keep it going for a year, we will have 52 joints of experience. Think how many chicks will fall for you like that.
For the sake of simplicity, you chose the size of your timber and scale the joint to the wood you have. The drawing comes for a 120mm piece.
The next joint will be chosen by one of the persons who finished the first joint before the deadline.
The next joint will be published the following monday (one week to "rest" and discuss the exercise) and the same rules apply. (I hope this can continue for a few months at least, so you need to take your tools if you go in vacations.)
When the drawing is post next monday, you sign your entrance to project mayhem by sawing "I'm in" in the comments. Once you are in, you cannot get out.
After completion there will be a "grading" of the joint, by yourself and your peers. By pointing out each other our mistakes we will learn and create something beautiful. Like linux, ya know.
Western tool can be used save ugly saws with blue plastic grips.
See you monday.
Over and out.
Wednesday, June 10, 2015

Tuesday, June 9, 2015
Holding Kanna
Short one today.

Alamo (Populus nigra) for the horizontal pieces morticed into rauli. Very wabi-sabi using salvaged wood with marks of it past life. My dad told me the axe marks in the rauli are to put wire and then plaster on top. Never seen that, but seems plausible. The alamo looked a bit burnt, but may be the disgusting air of Santiago. (I square the wood by flipping it and rotating it, no squares are harm in the process. I've never seen that explained but for me it's too trivial, you just need 2 pieces and understand what a square is. I'm using my jointer for the rough work.)

Full size. Maybe a tad to tall and definitely needs another rauli on the top to close the whole thing up. I'm thinking of more practice with yesterday's joint for the top.
After writing the post yesterday, and already in bed, I started to think of how to cut the inner part... and a small chisel along the grain making progressively deeper grooves could work. And it did.
The tenon is ready with no drill and no bottom cleaning chisel. I did mark quite a lot the end grain to break the fibres at the bottom but seems a fair price to pay for using only chisels.

Tomorrow I will be working on the last comments of my star-shaped paper, so it's computer day. After like 2 years is finally accepted in Phys Rev E while I'm jobless destroying a kitchen in Chile. I was asked by one of my coauthors what brings me to chile. Somehow the answer is that I sleep better here. Despite everything, the pollution, the corruption, the rampant neoliberalism (cause of the previous two) the place forces you to soberly face your conditions. If the problem is the solution, then the possibilities are endless here.
Everything under heaven is in utter chaos; the situation is excellent.

Alamo (Populus nigra) for the horizontal pieces morticed into rauli. Very wabi-sabi using salvaged wood with marks of it past life. My dad told me the axe marks in the rauli are to put wire and then plaster on top. Never seen that, but seems plausible. The alamo looked a bit burnt, but may be the disgusting air of Santiago. (I square the wood by flipping it and rotating it, no squares are harm in the process. I've never seen that explained but for me it's too trivial, you just need 2 pieces and understand what a square is. I'm using my jointer for the rough work.)

Full size. Maybe a tad to tall and definitely needs another rauli on the top to close the whole thing up. I'm thinking of more practice with yesterday's joint for the top.
After writing the post yesterday, and already in bed, I started to think of how to cut the inner part... and a small chisel along the grain making progressively deeper grooves could work. And it did.
The tenon is ready with no drill and no bottom cleaning chisel. I did mark quite a lot the end grain to break the fibres at the bottom but seems a fair price to pay for using only chisels.

Tomorrow I will be working on the last comments of my star-shaped paper, so it's computer day. After like 2 years is finally accepted in Phys Rev E while I'm jobless destroying a kitchen in Chile. I was asked by one of my coauthors what brings me to chile. Somehow the answer is that I sleep better here. Despite everything, the pollution, the corruption, the rampant neoliberalism (cause of the previous two) the place forces you to soberly face your conditions. If the problem is the solution, then the possibilities are endless here.
Everything under heaven is in utter chaos; the situation is excellent.
Monday, June 8, 2015
Homework
When you study physics, at least in Chile, you learn by doing homework. Real difficult problems that you need to solve before next week. During one semester we (as in the group of friends studying physics) didn't sleep one night, the whole night working and talking about the homework.
It was really intense and after that, everything else seems a bit like vacations. Vacations in hell as in Graz but vacations anyway.
While reading one of these old woodworking books I found the same. Exercises they were called here. First one was to make flat one face of a piece of wood with a chisel. Second, make flat and perpendicular the next face, again with a chisel. Quite fast the book was asking you to make a handrail or a boat... or something like that, really complex exercises.
What stuck me then was the order of the exercises. First of all not the sawing, or the planing, but the chisel. And use the chisel as a plane. I have never tried doing it, flattening a board with a chisel. I should try perhaps.
Anyway, today in the night, since we have a new japanese heater. The cylindrical ones where you can put your kettle and make tea later. I guess it fits my tools. So, having solved the cold problem for today, I decided to try some joinery in my room.
The rules are: no jigs, no knife marks, no rabbet planes. So everything is done, save the squaring, with chisel and hammer.
I want to make some shoji eventually (today we took half of the kitchen's tiles off, it's looking emptier and nicer already). So why not copy Gabe and try some miter tenon joints a la Odate?

Don't look at the rabbet, that was another exercise.

I love the way rauli (Lophozonia alpina) (in my times it was a notophagus btw) cuts. Gives you really crisp surfaces and it's a pleasure to work with.


I don't know if you can see it, but I didn't cut the last part of the tenon, there where the shadow is. I could not figure it out how to do it without a drill and you cannot put a saw in that hole... plus I don't have a bottom cleaning chisel.

If I were to make this for real, I would plane the mitres' end grain with a shooting board, then the sides of the tenon also planed and only use chisels for the inner parts. Faster and more accurate. Also, knife mark the lines and plane to them.
One of my tasks for the first months here is to make a collection of japanese joints, so expect more posts like this one. Maybe we call them one night stand joints?
It was really intense and after that, everything else seems a bit like vacations. Vacations in hell as in Graz but vacations anyway.
While reading one of these old woodworking books I found the same. Exercises they were called here. First one was to make flat one face of a piece of wood with a chisel. Second, make flat and perpendicular the next face, again with a chisel. Quite fast the book was asking you to make a handrail or a boat... or something like that, really complex exercises.
What stuck me then was the order of the exercises. First of all not the sawing, or the planing, but the chisel. And use the chisel as a plane. I have never tried doing it, flattening a board with a chisel. I should try perhaps.
Anyway, today in the night, since we have a new japanese heater. The cylindrical ones where you can put your kettle and make tea later. I guess it fits my tools. So, having solved the cold problem for today, I decided to try some joinery in my room.
The rules are: no jigs, no knife marks, no rabbet planes. So everything is done, save the squaring, with chisel and hammer.
I want to make some shoji eventually (today we took half of the kitchen's tiles off, it's looking emptier and nicer already). So why not copy Gabe and try some miter tenon joints a la Odate?

Don't look at the rabbet, that was another exercise.

I love the way rauli (Lophozonia alpina) (in my times it was a notophagus btw) cuts. Gives you really crisp surfaces and it's a pleasure to work with.


I don't know if you can see it, but I didn't cut the last part of the tenon, there where the shadow is. I could not figure it out how to do it without a drill and you cannot put a saw in that hole... plus I don't have a bottom cleaning chisel.

If I were to make this for real, I would plane the mitres' end grain with a shooting board, then the sides of the tenon also planed and only use chisels for the inner parts. Faster and more accurate. Also, knife mark the lines and plane to them.
One of my tasks for the first months here is to make a collection of japanese joints, so expect more posts like this one. Maybe we call them one night stand joints?
Sunday, June 7, 2015
Madonoko is the new black
I had trouble keeping up with Jason's pace and now I also need to be up to date with Gabe.
So, first of all, the setting hammer handle (I guess this a much smaller hammer than your Gabe btw):

together with a 6" square and my other hammers, the small one on the left and the curved one have new handles since I left the old ones in Europe, olive wood and cheery, both from the house. The thickness of the handle tells you how much force you use in with the hammer. The same with door pulls, if I remember correctly, said Krenov. I tend to like shorter handles than factory made japanese hammers, the setting hammer being the exception. I'm still not sure about the cherry handle also... need to keep studying this. I see handles as something that need to be transparent in use (Heidegger's term), that is you don't feel it when you use them, they are an extension of your hand.
Going more down you can see some of the saws.

All this is temporary as I plan to move the workshop downstairs once the Roubo bench is finished. This is how it looks, amazing what you can bring in 3 bags
 So, the Madonoko.
That's a saw with "windows", not the crappy OS but big gullets along the edge.


So, first of all, the setting hammer handle (I guess this a much smaller hammer than your Gabe btw):

together with a 6" square and my other hammers, the small one on the left and the curved one have new handles since I left the old ones in Europe, olive wood and cheery, both from the house. The thickness of the handle tells you how much force you use in with the hammer. The same with door pulls, if I remember correctly, said Krenov. I tend to like shorter handles than factory made japanese hammers, the setting hammer being the exception. I'm still not sure about the cherry handle also... need to keep studying this. I see handles as something that need to be transparent in use (Heidegger's term), that is you don't feel it when you use them, they are an extension of your hand.
Going more down you can see some of the saws.

All this is temporary as I plan to move the workshop downstairs once the Roubo bench is finished. This is how it looks, amazing what you can bring in 3 bags

That's a saw with "windows", not the crappy OS but big gullets along the edge.

Yo may have seen this before, it was a ryoba and now is a kataba. The small nip on the top is a remainder: do not shear hardened saws. It broke like glass as I sheared, good I was far from my line. After that I used the grinder and files to refine the curve. Still thinking about that shape to give it.
This is a 2/5 pattern, the gullet is 2 teeth and the rest 5 with 1 rip and 4 cross cut. This way the cross cutting teeth are alternating, something I've seen in Nagakatsu's saws. What's the difference with the 1/5 pattern? No frikkin idea. The gullets are larger, that much is true. (ie easier to make in smaller saws.)
Here's Gabe's pictures of his madonoko, far better than mine:
http://granitemountainwoodcraft.com/2015/06/07/diagonal-chomasaru-western-panel-saw/
I haven't finished the saw because I have no saw vice here in Chile yet... but it seems that what we really need to make is a sen. Monday's project perhaps?
Finally,
And the Roubo bench? Well, I was planing the other half of the top with my No 5 till I decided to make that olive wood handle and the rest is history. I had so much fun with my kanna that the bench went on vacation.

Friday, June 5, 2015
More colours
I got some help from a japanese friend of mine and he corrected my previous drawing. I was missing the signature, a proper tang, and the filed holes on the blade.
And a more realistic configuration.

Easy, you just take (uniform) random "kicks" in either direction with a random (Poisson distribution) size and you see what happens. Again, blue means going inside the screen and red going outside it.

Maybe tomorrow I make a video but I'm not sure, I don't think anybody is actually following this rambles. Should do Roubo benches instead.
Ok, sorry for that. I know I'm an awful teacher (that's why I don't give lectures) so when something is clear for me I don't see the point of explaining it further unless somebody asks me specific questions. So go ahead and ask if something is not clear.
For the sake of open source full disclosure and all that, this is the code for making the plots, runs in mathematica, which albeit not open source, comes in raspberry pi's linux dist:
nH = 20;x0 = RandomReal[{-1, 3}, nH] // N;y0 = RandomReal[{-1, 1}, nH] // N;\[Sigma] = -Log[RandomReal[{0, 1}, nH]]/8 // N;sign = If[# > 0.5, 1., -1.] & /@ RandomReal[{0, 1}, nH] // N;surface =Total[Table[sign[[i]] Exp[-((x - x0[[i]])^2 + (y +y0[[i]])^2)^2/\[Sigma][[i]]], {i, nH}]];DensityPlot[surface, {x, -3, 3}, {y, -3, 3},ColorFunction -> GrayLevel,PlotRange -> {{-4, 4}, {-4, 4}, Full}, PlotPoints -> 50,RegionFunction ->Function[{x, y, z}, x + 10 > 30 Abs[y/2] && x > -1],Epilog -> {{White, Disk[{-1, .1975}, .07], Disk[{-1, -.1975}, .07]},Triangle[{{-2.5, -.125}, {-3.5, 0}, {-2.5, .125}}],Rectangle[{-2.5, -.125}, {-.99, .125}],Table[{If[sign[[i]] > 0, Red, Blue],Circle[{x0[[i]], -y0[[i]]}, 0 \[Sigma][[i]]]}, {i, nH}]},FrameTicks -> None]
Thursday, June 4, 2015
Straightening saws (or going with the hip)
So, everybody is sharpening and straightening saws nowadays.
First, my favourite american in Hawaii gave us a lesson on how to make things flat:
http://mypeculiarnature.blogspot.nl/2015/05/japanese-saw-tuneup-straighten-out.html
Then, another american appeared who has a few very sexy whale blades and is turning everything into planks
http://granitemountainwoodcraft.com/2015/06/02/just-cant-stop-sawing/
I've been busy cleaning the trees so some sun can reach the house and I haven't had much time for tools. However, today was feeling ill so decided to take it easy and work a bit with the computer.

That's the representation of a not so straight saw. The blue is bent to one side and the red to the other. Green is level.
I took inspiration from this saw:

What I'm trying to illustrate is the displacement field of the saw. If you wish, how far it has moved form its ideal flat straight state.
Now, some saws will have one "oil puddle"


And eventually much flat


And this is how it looks from one side
 And the other.


 then you hit the leftmost
 then the red one down (note how the wave of the saw has changed direction by pressing the kink)
 and finally the middle kink

First, my favourite american in Hawaii gave us a lesson on how to make things flat:
http://mypeculiarnature.blogspot.nl/2015/05/japanese-saw-tuneup-straighten-out.html
Then, another american appeared who has a few very sexy whale blades and is turning everything into planks
http://granitemountainwoodcraft.com/2015/06/02/just-cant-stop-sawing/
I've been busy cleaning the trees so some sun can reach the house and I haven't had much time for tools. However, today was feeling ill so decided to take it easy and work a bit with the computer.

That's the representation of a not so straight saw. The blue is bent to one side and the red to the other. Green is level.
I took inspiration from this saw:

What I'm trying to illustrate is the displacement field of the saw. If you wish, how far it has moved form its ideal flat straight state.
Now, some saws will have one "oil puddle"
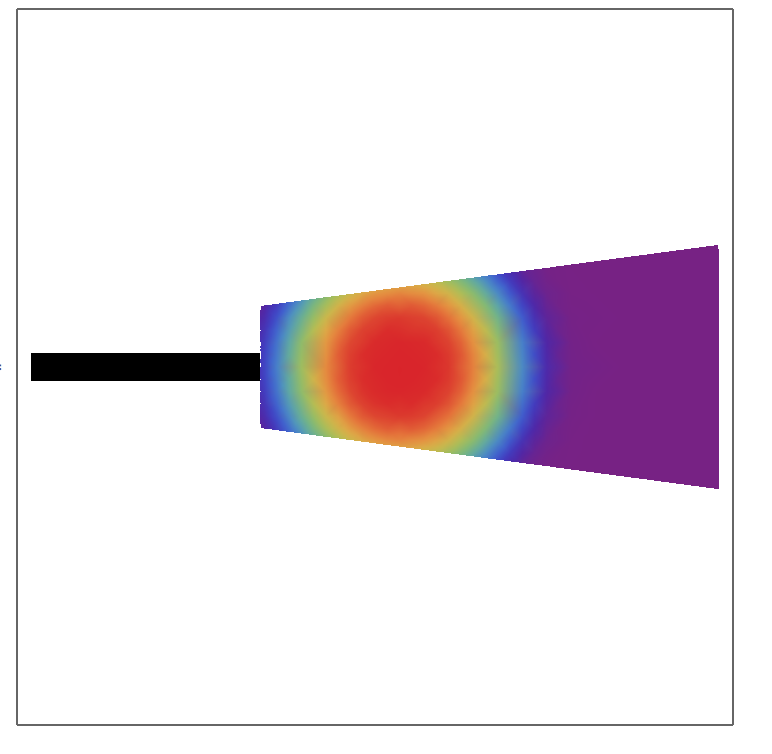
This are the ones you need to work in a circular manner (isn't it Jason?) so you expand the ripples around till you get something "flatter"

And eventually much flat

Note that in the different drawing the colour scale is not the same, the amplitude of the waves gets smaller as you have more ripples. (Sorry for that, I was lazy today too so didn't want to code that, perhaps I update it later.)
Now, when I was looking at the saw today I was mentally superimposing this colour map on the surface of the saw, a bit like Jason's pictures but with LSD colours.

Yeah, I know, reality is not as circular and nice as computer models. But that's the fun of it, isn't it?
So you hammer, change the colours, turn up and down the saw, and keep in your mind updating the colours as you hammer. Check with the saw that the image you have in your mind corresponds to reality by looking at how straight the saw is.
All this is a bit like trying to teach how to play violin by writing, so don't blame us because our explanations are poor.
After 10 minutes or so the saw was 90% straight.
I sanded the surface and then more hammering. (I had to fix a shitty stanley pein and ball hammer in the meantime.) Then I stopped.
"Know when to stop" says Mark.
I upload the picture of the straight saw once the battery of the camera is full.
Done. Camera is full and I had my tea and bread with cheese.
Now, there are just a few spots on the saw.

And this is how it looks from one side


There's still a kink on one side near the handle but I don't think I will be spending files on this saws, so it doesn't matter.
Just for the sake of coolness, a before and after picture:

Ok, and since I had more time think about the problem, what follows is the evolution of the "saw" when you invert each of the 3 kinks it has. (Some kinks are pointing in one direction and some in others, and what I do with the code is simply to invert the sign of it). To make it more "realistic" I superimposed a wave as in the first image, that is a saw that has both kinks and it's bowed.
You start with this:


As you see, it's not so easy. Thanks god you don't need to compute the eigenvalue decomposition of the problem, but simply hammer it straight.
Continuing with the analogy of the violin, you know where to hammer to produce a sound, and you just do it. It's only a saw. You are only You.
Monday, June 1, 2015
First fire
Today was a good day. Somehow, the municipality has a truck that comes every monday around and takes all your gigantic garbage for free. Everything. From trees to concrete passing by old crappy chairs.
So the house is very fast getting cleaner.
I also had my first "helper" today. Nico, the son of the girl who takes cares of my packages here in Chile and ex-neighbour, who wants to learn a bit of carpentry.
So in the morning I put him to plane some wood with the No 5. (You always need a plane you can trash, western planes are perfect for this.) I'm starting my morning grabbing one or two pieces from the pile there, and planing it clean, then taking the wood inside the house. The wood has been for several years there, just laying around, so most of it is really fucked up but some pieces are still salvageable.

This is "roble", the chilean one. So not oak, which is called encina here, but Nothofagus obliqua, a native species. It's used mostly in old houses for sills and the like. It's a dense and hard wood, a bit like beech but with a wilder grain, perhaps reminiscent of ash. Or maybe just roble.

After the morning coffee and tacos with cheese and chili (I need to make a post of the food in Chile, I love the colours of it) we went downstairs to clean. The "closet" went out and under it a nice surprise.

Very mouldy rotten wood. It was a great idea not to put any kind of ventilation there. You can imagine the relation with my dad at the moment is a bit tense. Pretty much everything he makes is fucked up (save the stone walls) and today 2 axe handles where in the fire...

Anyway, we left that there to dry and I sent nico to the clean the roof and I took a few pictures.

After that we cut that old dry pine in the right with the big madonoko I got. It cut so well that I went to make a handle for it, it's a really really fast beast, more info will follow. (I'd love to make video to show you the speed of these things, a la tanaka, but my camera is crap for videos and Julia's ipad is coming in november with her... so we need to wait)
Around 5 we were dead tired. We spend the rest of the afternoon cutting trees to let the sun reach the house, so a lot of machete and sawing and moving around. For sure not the same kind of job I was used to in Graz.
After dinner, we went down, and made the first fire in my old house,

and decided that tomorrow I take it off and go to Santiago to buy some nice wood and see friends.
(BTW, I implicitly assume that if you read here, you also reading Jason's blog. Yesterday he nailed it and wrote the best ever intro to saw straightening, really eye opening. Give it a read, and then another one, this is very subtle stuff and you need to experiment and read, and then repeat. I'm very much looking forward to part 2 http://mypeculiarnature.blogspot.nl/2015/05/japanese-saw-tuneup-straighten-out.html If everything goes according to the plan, by summer 2016 we will have documented the whole process of metate and the saws will start to sing again.)
So the house is very fast getting cleaner.
I also had my first "helper" today. Nico, the son of the girl who takes cares of my packages here in Chile and ex-neighbour, who wants to learn a bit of carpentry.
So in the morning I put him to plane some wood with the No 5. (You always need a plane you can trash, western planes are perfect for this.) I'm starting my morning grabbing one or two pieces from the pile there, and planing it clean, then taking the wood inside the house. The wood has been for several years there, just laying around, so most of it is really fucked up but some pieces are still salvageable.

This is "roble", the chilean one. So not oak, which is called encina here, but Nothofagus obliqua, a native species. It's used mostly in old houses for sills and the like. It's a dense and hard wood, a bit like beech but with a wilder grain, perhaps reminiscent of ash. Or maybe just roble.

After the morning coffee and tacos with cheese and chili (I need to make a post of the food in Chile, I love the colours of it) we went downstairs to clean. The "closet" went out and under it a nice surprise.

Very mouldy rotten wood. It was a great idea not to put any kind of ventilation there. You can imagine the relation with my dad at the moment is a bit tense. Pretty much everything he makes is fucked up (save the stone walls) and today 2 axe handles where in the fire...

Anyway, we left that there to dry and I sent nico to the clean the roof and I took a few pictures.

After that we cut that old dry pine in the right with the big madonoko I got. It cut so well that I went to make a handle for it, it's a really really fast beast, more info will follow. (I'd love to make video to show you the speed of these things, a la tanaka, but my camera is crap for videos and Julia's ipad is coming in november with her... so we need to wait)
Around 5 we were dead tired. We spend the rest of the afternoon cutting trees to let the sun reach the house, so a lot of machete and sawing and moving around. For sure not the same kind of job I was used to in Graz.
After dinner, we went down, and made the first fire in my old house,

and decided that tomorrow I take it off and go to Santiago to buy some nice wood and see friends.
(BTW, I implicitly assume that if you read here, you also reading Jason's blog. Yesterday he nailed it and wrote the best ever intro to saw straightening, really eye opening. Give it a read, and then another one, this is very subtle stuff and you need to experiment and read, and then repeat. I'm very much looking forward to part 2 http://mypeculiarnature.blogspot.nl/2015/05/japanese-saw-tuneup-straighten-out.html If everything goes according to the plan, by summer 2016 we will have documented the whole process of metate and the saws will start to sing again.)
Subscribe to:
Posts (Atom)