Monday, October 19, 2015

Sashigane addiction

Travelling again, enjoying the German autobahn and it's punctual train and lovely buses. Irony of course, god I'm starting to hate this country.

We visited first Pauli in Essen, then moved to Münster to plane some oak and "Platane" with Till (Pauli's bf) and then I was picked up to help a friend with some restoration work in his family farm. He said it had to do with wood so I said yes, but he didn't mention powertools and dust, then I said no and spend saturday in the kitchen making pizza and sunday mostly in bed playing with my sashigane. Not in a masturbatory way that is.

I didn't bring my computer and my fingers were itching for writing some posts about this magical little tool and all the stuff you can make with it.

It seems to me that this sashigane thing will go for a long time, together with the mathematics/geometry of roof explained by a phisicist so I'm making a new tag for it: sashigane.

Let's go to it then.


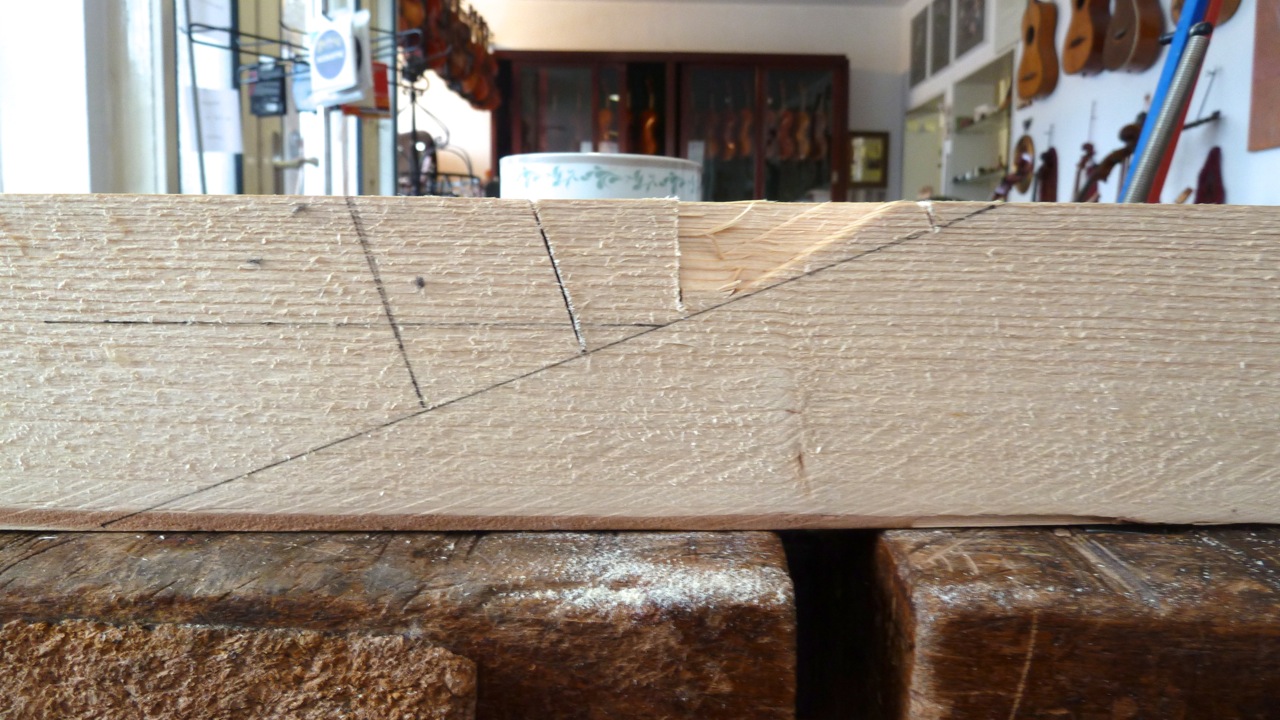
First picture: How to draw a given slope. Say 5/10. You take the edge of timber, mark 5 on one side, 10 on the other, and you got it.

If you don't get it the why (as I didn't) maybe you can use some trigonometry.


The two triangles, the one with sides 5 and 10m and the other with sides 10cos(alpha) and 10sin(alpha) are equivalent, they both have the same slope. Homework, prove this.

Now, for Gabe's last joinery layout the half-roof pitch was not explained so here it goes.


Since the rafter is angled at 45 degrees the run becomes 10sqrt(2) You take a perpendicular to it that connects with the edge (same length since it's at 45 degrees) and the hypotenuse of that triangle is the new run for the side cut of the keta. Look here if you don't know what I'm talkin about:

http://granitemountainwoodcraft.com/2015/10/17/layout-for-simple-japanese-hip-roof/

and check this picture in particular:


In Gabe's case the slope is not touching the edge but it's parallel to the line I draw, thus has the same slope. Questions just ask, I don't know your level of geometry so I assume you got the basics as pytagoras, thales theorems, and sin, cos, tan notions.

So, why addiction? well look at this. You just move your sashigane around and the joints start to appear by themselves. Crazy shit.


 Here I was playing with slopes and realized that the splayed leg problems is trivial with a square and some approximations.


So this is the second lesson of today, and it's how to compute the square root of a number without a computer (great, written in a computer, I see the irony).

So, first of all why you need to compute square roots? Because we live in an eculidian space in the local universe. What do I mean? That the shortest line between to points on the world is equal to the square root of the sum of the displacement in each dimension squared. (That is, Pytagoras theorem is not a theorem but an axiom about what kind of world we live in. In you draw a triangle on the surface of a sphere instead of a plane it does not hold anymore. {I told you that learning geometry from a physicist was crazy, they always take detours to explain things.})

Anyway. Sqrt(100) = 10. That is, 10*10 = 100. Sqrt(156) = ????

Let's say we have a splayed leg with the following diagonal slope of 8/10.


First we need to know the length of the leg eh? So by pitagoras the hypotenuse is sqrt(10^2+8^2).

EDIT: thanks to jason I found my math was horrible. 8*8 is not 56 but 64, so now I edit the approximation accordingly. sorry for that.

Exactly, sqrt(164). 13 times 13 is 169. So let's write it like this: Sqrt(164) = Sqrt(169*(1 - 5/169)) = Sqrt(13^2)*Sqrt(1 - 5/169) = 13 * (1 - 0.015)

CHAN!

The last equal sign is not actually an equal sign but an approx. I use the following formula: sqrt(1+x) = 1 + x/2 when x is way smaller than 1. That's called Taylor expansion but doesn't matter a ball the name, just bear with me or google it.


So now that we know the length of the hypotenuse we can compute how much to decrease the square leg so once splayed appears with a square cross section on the plan.

Say we have a 10x10 cross section beam. The new diagonal length needs to be 10/13 so when it's splayed it's again 10.  Let's write 10 = 13 - 3 so 10/13 = 1 - 3/13  = 1 - 1.5/13 - 1.5/13

So you divide the side in 13 parts by using your sashigane in diagonal so it covers 130mm and mark one vertical line every 10mm then you take 1.5cm from each side and pass it to the diagonal with compass and not a vertical line as I did in the drawing.


Now go and try it for a slope 7/10 and tell me the answer. I go and try to cut a gothic roof in the meantime.

Thanks Jason for catching the error and hope this solve your doubts. I may draw the triangles again so they show the right numbers

Monday, October 12, 2015

2 quotes

I continue reading to our friends:

"No society, then, but worlds. And no war against society either, to wage war against a fiction is to give it substance. There's no social sky above our heads, there's us and the ensemble of ties, friendships, enmities, and actual proximities and distances that we experience. There are only sets of us, eminently situated powers, and their ability to ramify throughout the endlessly decomposing and recomposing social carcass. A swarming of worlds, a world made up of a whole slew of worlds, and traversed therefore by conflicts between them, by attractions and repulsions. To construct a world is to create an order, make a place or not for each thing, each being, each proclivity, and give thought to that place, change it if need be. This is why the first duty of revolutionaries is to take care of the worlds they constitute."

This reminds me of windows being fixed, logs being cut and lunchs being cooked. We are taking care of this located worlds, our little worlds, half a world apart, that we may or may not drop by next week or next year. Nevertheless they remain ours. A little bit of each one is there, here, in a saw, in an inkline, in a certain way of doing things that we picked up from each other.


I went out today to buy food for tomorrow's pizza and took the camera with me, I wanted to take some pictures of Celle's Fachwerk. The light was not good and all the pictures suck. Or rather, they don't reflect the world I see when I look at these buildings.

And then I thought, actually, it's not the buildings what I want to take with me once I leave this town for good. Not the chamfers you put on the beams or the joints that you use and how much of a gap you allow. It's trying to understand what makes you to organise yourself in such a way as to produce so much beauty in a way that becomes "natural" for you. Where does this need to build properly come from, and how can you cultivate it and pass it along? Why do you develop so much diagonal bracing in a country with no earthquakes while in japan you use none?

I think it's about listening to what the world has to say. Which sound like something Heidegger would have said. So why not end today with a quote from the little german then?

But those who wish to transform must bear within themselves the power of a fidelity that knows how to preserve. And one cannot feel this power growing within unless one is up in wonder. And no one can be caught up in wonder without travelling to the outermost limits of the possible. But no one will ever become the friend of the possible without remaining open to dialogue with the powers that operate in the whole of human existence. But that is the comportment of the philosopher: to listen attentively to what is already sung forth, which can still be perceived in each essential happening of world.

Thursday, October 8, 2015

Yosemune no Sumi II

Ok, before you complain for the poor fits and the fast cut joinery (and the use of band saw) let me tell you one thing. This thing is addictive. I could just not wait too see if it was actually going to fit.

But it kinda did.

The ga is because the distance between the two points under the hip rafter was computed along the plane and not the pitch... I see it now. But that's close enough for a first trial.

Some pictures of the drawing:


I made just the nose, since I wanted to understand the rafter I didn't need the back part. Once it's in place I draw the lines. Now you need to pass the centre line of the rafter to the beams... at 45 degrees and sloping. The slope you see on the sides.

It took me 3 trials to find out which pitch was the one going there. Half roof pitch, triangle marked line according to yesterday's drawing.


Sorry for the poor lighting.  Looks cool isn't it?


I kept on marking the lines to keep track of where I was. 


 And another poor light photo. I make the other dovetail and post it later.


 From the back side.

Remember that I draw the lines with the dovetail in? Well, I also chiseled it and broke it a bit, that's why the nose is bent a bit now.

Naked joint:

 and disassembled.

This part was real fast. I did use the band saw to speed up the cross cuts, and even tried the other dovetail in it. It sucks.

I'm a bit on an adrenaline kick, feel like having reached the top of the mountain and now you can say "it wasn't that hard, was it?"

Oh, and something I wanted to comment on after reading a piece of Chris Schwarz about learning. I also had it in the university, all the homeworks that made you feel really stupid, overstressed and depressed. You learn like that, it's true. But it's a bit stupid to pay people to enslave you so you can learn just because you are not free enough to teach yourself something. (Maybe this doesn't apply to medicine though.) What university (and courses) does is to organise time for you. From 9 to 12 lectures, then you need to eat, and homework. It kinda works. ( One of the professors I was assistant of used to say that 90% of the people didn't learn anything in the university... and then proceeded to blame the people and not university. I dated his daughter too.) But there are ways of learning otherwise... programming for example. I do not know any good programmer who had learnt in classes what he knew. They read, program and make mistakes. And document the whole thing. That way they made linux.  That's because they know they can do anything they want in the computer, they just need to learn how to write it in code. I'm starting to think that the world is the same. We can do whatever we want with it, and just need a few tools to do it. We just need to learn the how. And document it, so it's not lost.

Enough bla bla. I need to get larger timber to make the real model.

EDIT: I moved the model where there's more light. I should look like this


This is how Chilean standards for construction work: if it can hold a beer, it won't fall in an earthquake.


The line of the pitch.

And the oversized cut... I planed a bit too much that part.


The problem with the gap at the was that I put the base where the point should go. So I took it out and fitted "perfectly" (I made another mistake at measuring the depth of the cut, that's why you need a 160mm height piece...

Wednesday, October 7, 2015

Yosemune no Sumi: Rpoject Mahyem intermezzo

You know that that is, isn't it?


While we wait for Jason to finish his joint I decided to start with something more complex. Or rather, something I don't understand well how to make. Once you learn it they are all the same easy joint. 

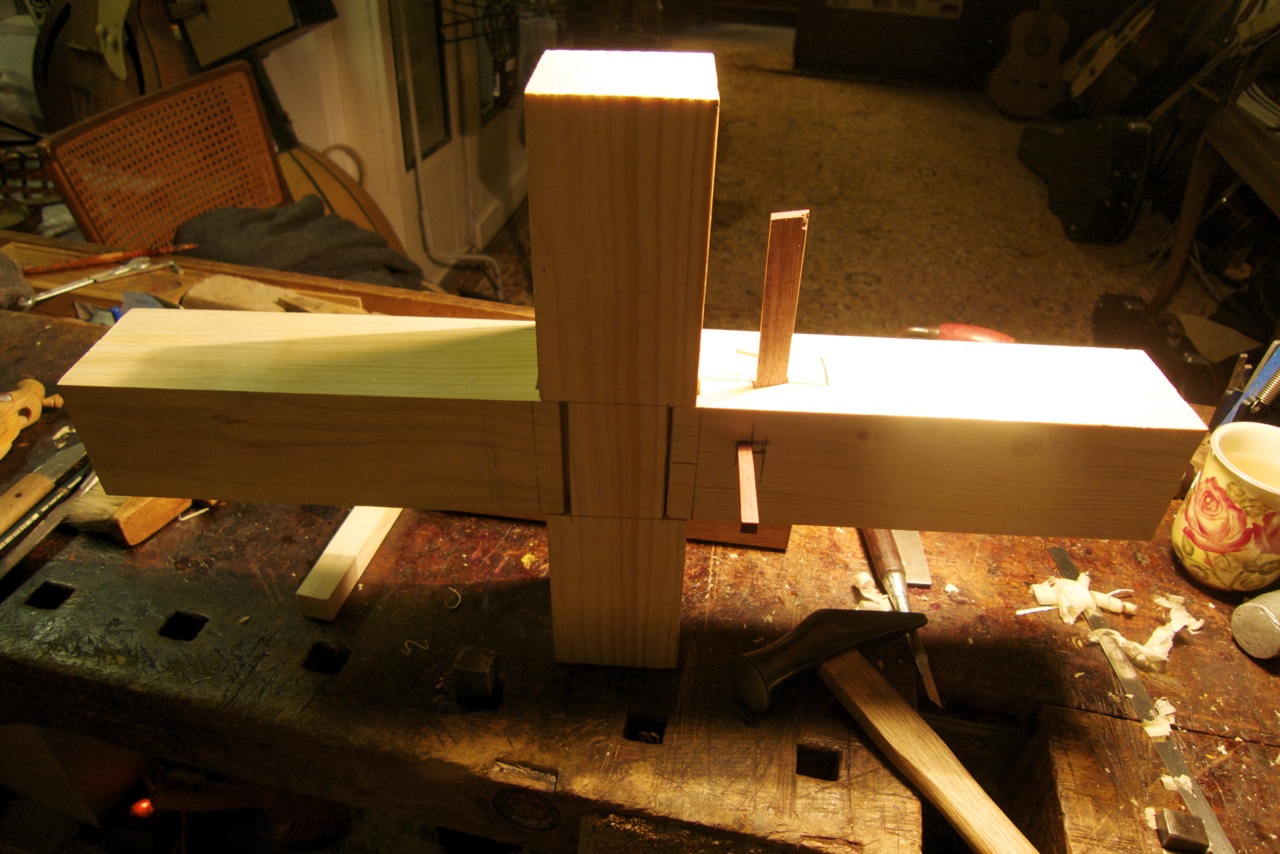
This is what I want to make this week:


The horizontal members are easy to make, dovetailed on into the other. Once they form a T (or an x, depends where you look from) you need to put the hip rafter on top. That was the part I had trouble with. 

I remember o have studied this joint in some airport, I managed to understand the geometry and the square roots of the pitch, but one thing is to understand on the paper, a ver 2D being, and other completely different to pass that into 3D timber. At least for me. 

It took me around 4 hours to understand what pitch was the one I needed to put on the rafter. 


I even had a nap in between to activate my brain zones that have to do with mathematics and sleep. 

(Now you see that the mathematics problem from the last joint was useful?)

Of course, once I understood which pitch was the one needed there, I found a small legend:


I was complaining why it was nowhere written the pitch of the line... but it was the whole time in front of me, I just wasn't seeing. 

There are a lot of square roots of 2 going on in this joint, that's because the pitch is regular, so the same on both sides of the roof. 


This was another difficult one. But I don't want to give too many details so you can find out by yourself.

I also got my sashigane today. Looks small and doesn't come with sqrt(2) marking on the other side, so I'm thinking of filing a notch at 10.14cm. Shit, I meant 14.14, I'm a bit dyslexic.  I guess I have a mistake on my layout.


Using the sashigane was like meeting an old friend. It's light, flexible, square. It's easy to use. Like in EASY!!!!! I really don't know how I lived without one before and I may get a 50cm one. It's one of those tools that once they go into your hand you don't want to let them go


And another square. I was a bit short of squares for the course. I know, I should make some for the students, lousy excuse. I just love starrett squares. They fit so well in the hand. I will go down and make a wooden square now as punishment for buying another tool. (There was some roosewood left from the sashisen of last joint.)


 Anyway, after 5 or 6 hours nap and walk in the city included, I started to cut the joint.


 Exactly, first cut and went over the line. Idiot.

Chopping was easy and fast


 and later had to sharpen Opa's 1" chisel again, western steel lasts nothing. I should have brought one of my paring chisels.


I'm working here with a 3"x3", but the drawing is for 120x160mm so I need to visit the home centre before making the real model.

Tuesday, October 6, 2015

A frame for Frauke and Summer School News

Hi ho.

That's a citation to Kurt Vonnegut in case you didn't know.

Today I made a frame for Julia's mother. She wanted to hang this painting Julia made years ago and Sebastian needs to work on that. Frauke said you can just screw it. I said, "I literally can not."

So haunched mortice and tenon had to be, with a dovetailed middle bar


 It's a small tenon, 5mm width or so


The pieces where a tad different, but the good thing of working with hand tools is that you make the whole frame oversized 2 or 3mm, and then put it through your planer, ie yourself. This works for any size.

I realised, when taking the picture, that it looks quite similar to a window. So I guess I can make windows now. This is the painting.


Not my favourite from Julia's but her mother likes it.

Now for the summer school news.

I wanted to be sure that I will have people in Chile to help me with this crazy idea before giving more details about it. I hope at least 2 of my ex-students can join so there's hope already for the school happening with more than myself there. The kiwi has already confirmed for the two weeks while the chilean only goes for a weekend.

The place? Somewhere around here: -36.807075, -71.639315

What's there? There is a river next to the place, 5000 m^2 of forest that we can use, and hot springs 4 hours walking.

If I'm not mistaken there was also a saw mill next to it, and a slate quarry near by. But pretty much is like Jason's piece of land, somewhere where man hasn't put his hand yet.

What's my idea? Stay there camping 1 or 2 weeks in february. Build a structure. Maybe something as simple as a deck to sit and chill out, or if we are more people and have more time, a roof and some beds to sleep during summer afternoons.

If we have some time we could cook some charcoal, build a fuigo, and start making saws right there.

At the moment I don't have a car to go there so maybe we need to hitchhike or walk with the tools in the back or what not. But we should be able to arrive there somehow. We will need to carry food since there's nothing around where to buy. (Maybe we can buy a small animal and make a big bbq but that we need to see once there.)

For sleeping you need to bring a tent and stuff to put you inside of. Or wire and an axe and make your own shelter. If you are coming from abroad and don't want to bring too many tools, a good axe, a few stones and big saw would be helpful. Small tools I have enough for all. I will try to buy some japanese axes for then too. No electricity I'm aware of, so leave your computers and cellphones in Santiago.

The weather should be lovely by then, around 30 degrees at midday, perfect for a swim in the river. The nights may be a bit cold but there is wood to make a fire. Arriving there we need to build a table, a compost toilet, and some forks. Maybe a lathe to turn some plates?

God knows what we will make.

But we will know the why and the how. And that's what matters most.


Monday, October 5, 2015

Is there a moral?

At this point it looked like the crucifixion by Bacon. 


 So I just kept on going wanting to die


 I measured something wrong.


Or maybe I didn't measure it at all


It looked well when I tried one, and then the other.


Didn't think of trying them both at the same time. Next I do. I anyway call it done.

Sunday, October 4, 2015

To Our Friends — How I set up my sole — Project Mayhem revival

Today we have 3 sections: theory, kanna conditioning and project mayhem. In that order.

Part one: To our friends

That's the title of the book I'm reading right now. Worth reading, and if you are in the north of Holland you may receive a copy of it when I drop by there.

"A revolutionary perspective no longer focuses on an institutional reorganization of society, but on the technical configuration of worlds."

The book is written for those of us who want to change the world, and analyses the popular revolts of the last years, from Occupy walt mart street to Tahir square. Which is good but that's not the interesting part of it, the best is the way a different ontology and conception of the human are put in place to understand in what should consist a proper revolt. Very useful for us working on how to organise ourselves to learn forgotten crafts and thus make different worlds.

"If we want to regain a perspective, we have to couple the vague awareness that this world can't last with the desire to build a better one."

Second part: Remember my cheap 20usd plane I got from Junji? Well, I keep on tuning that babe for the next workshop in Friesland and thought that would be good to show you how I do it this time.

I've got no weird-name kanna to flatten the sole here (neither in chile for that matter) but what I do have here is wood and some steel. Wood burnishes the sole and steel scrapes the burnished wood.

Capicci?

In general this is difficult to photograph but since I was planing ebony it makes things easier since it dyes the wood.

There you have it. The black parts are high spots, and you scrape that away with your favourite scraper or piece of broken glass. Cheap isn't it?


That's my scraper (in fact, Opa's scraper) next to my inlay exercise.

And does it work? Of course it does otherwise I would not mention it. Spruce:

 Pine:


Thick shavings of ebony:

 Thin shavings
 The surface it leaves


 and the wear of the blade (and more sole dyeing if you look carefully).


 So, you don't even need a straight edge to flatten your sole, if you pay attention to the way it interacts with the wood, you can do it without it.

The great thing of this method is that is  really slow. What does that mean? That you can see and feel the effects of making a better wave on the sole in a progressive way, little by little. And you understand how precise you need to be and what effects has what you are doing to the plane. The problem I see with the dogma of the sole needs to be such and such, is that you don't understand why it needs to be like that and how it affects your planing when it's not like that. Or I may have too much free time.


Third part: today was a lazy, very lazy sunday. Yesterday a friend of Julia was djing in a dub party and man it was good. Feet hurt.

So I decided to slowly, very slowly, cut the male piece of project mayhem homework. Just 2 months too late.


 For the long tenon the fastest seemed to just split the wood with a chisel. I used the saw for the cross cuts and the small rip cuts in the shoulders of the tenon. Then we went for a walk and trying to get bread in the city.

Four hours later I started to make the mortice.


There are not too big mortices, only small hammers. Here I'm using my new 500gr moster. The chisel is a 12mm btw to have a sense of scale. The wood is 3"x3".

To make the female part of the shoulder I chisel it out as if it were a mortice.

 With the V-method

 Then pare away to the line (not finished here)


 After a lot of paring the mortice and planing the tenon's cheeks, I left for bed like this.


Hopefully tomorrow is finished.

So Jason, are you going to finish it this week?