Wednesday, January 28, 2015

Busy time

I'm very sorry it has taken me so long to update. On the one hand, I was doing "documented" stuff, that is cleaning kanna, making uradashi, sharpening old blades, so there was not much new stuff going on. On the other hand, I'm 10 weeks from the end of my contract and I'm programming the last "experiment" and submitted the paper. It's not a hard job but your mind gets squatted by it and I don't feel like doing much more in the nights.

Anyway, what it is slightly new (for me) is my study of compound angle geometry:


I was reading the carpentry way, his series on the splayed leg saw horse, and I liked the problem: how to shape a piece of wood such that when you cut it in a horizontal plane the result is a square.  It's the same as hyperbolic shapes I was talking about when looking at the slope of the gullets, if you incline your plane (or your timber) things start to look weird.

So, I grabbed some paper, made four parallel bents, and made a mock up of a wood with it. Then I cut in diagonal and tried to make it fit in the table. The result is that the shape looks like a diamond. Now, if you start with a diamond shape with the inverse factor, once you splay it and cut a horizontal through it, you have something like a square:


Sorry but Julia threw away the paper piece before I could take a picture of it.

Again, no measures, doing things by eye only. You need to multiply the diagonal that will enlarge by the sinus of the angle you are  rotating the leg... sounds more complicated than what it is, and that's why making a model with piece of paper is useful, once you cut it, you can open and see how japanese guys draw things:


Give it a try, it's simpler than what it looks.

After that, I wanted to try a small roof model:


Nothing fancy, just a 30minutes exercise.

The good thing of coming from a underdeveloped country, is that by doing something slightly nicer than the model I will have the coolest roof on the country.


On the other news, the hobelbank found its new home at Sebastian living room. I would really like to rent a couch for the next 2 months.


This is how it looks at my workspace:


Knees complain a bit. And sawing straight is more difficult than at the bench. My planing beam is some construction lumber I took from the street. It sucks for planing so now I'm thinking how to use the ash I have left. I do like the length of it. I can plane comfortably 50cm, and 70cm leaning some more. I also like the slope but it needs to be higher. It's anyway good to see what works and what not.

I managed to finish 2 lids for the boxes inside my toolbox. I had to resaw the long ash piece down there. I was 30 minutes like a stupid dog with a bone too large for him till I discovered some things called clamps. Man I missed my vice.


With those 2 boxed finished I have the bottom of the immigrant's tool box full. 15 kilos already, maybe a bit more, and no planes inside. Just blades, files, chisels. Once I have the final list with its weight I will post it here. I'm taking as little as possible that gives me the feeling of a smooth start once I'm there. Each item has a few reasons to be there, for example I just ordered 3 naniwa speciality stone because they are the thinnest and lighter in the market and because the diamond stones chip some of my hard kanna blades, which is not fun. I have plenty of files because in chile you cannot get nice used ones. Diamond lapping plates to restore what I find over there. The hammers... well, I may have a small hammer problem.  The 20 saw blades are needed for practice and proselytism. You get the idea no?

I promise that once there I will have more time for writing and making things, instead of this endless preparation.


Thursday, January 15, 2015

Urashite (うらして)

コに痴話!

I bought a book to learn hiragana, so need to practise. 

Urashite (うらして), pronounced ura-shi-te, is the process of taking a shitty ura and making it into a decent shite. 


From shite to blade in 2 hours
There's not much info in the internets of how to do it. Some people use a dremel. Tanaka just shows the result. I use a hand cranked grinder. 

Why a hand cranked grinder? Because I have one and it works. I don't have a dremel so no way to use that one. 

This is my setup:

Half japanese, half a mess. I clamp the grinder to a piece of wood so I can sit in front to it. With one hand I hold the blade, with the other I turn, and with the third one I take pictures. That's the movement I do.


 As you see the grinder is quite small, but don't let that deter you.

Just keep a steady hand and swingle on top of the grinder. At low speed. Also, don't clean the grinder, the rust in the pores will make for a slower and more controlled grinding process.

Start from the middle and then swing to the sides, you eventually learn to see where the wheel is cutting. Your body gets use to it quite fast. It's more precise than what you would expect.  Grind a bit, from the centre towards the sides of the blade, once the dirt is gone, check with a source of light for the reflections, they tell you the shape of the ura. Also use a flat diamond stone to see the flats.


 Look at the right side. It is under level but the curvature is not right. There is a line of light between the two valleys. I will fix it next time.

The centre is easily concave. The diffusion pattern tells you that.


And the other side. Here you can see I have another flat next to the "real" flat at the side.


And the edge. Since there is not much hagane left here I am not going all the way down.


That's it. I made around ten rounds of grinding, lapping, checking. A bit of tapping the back also when lapping. Just keep on moving, slowly. 

Oh yeah, and I may have made out うらして, so don't quote me. 

Sunday, January 11, 2015

File-Making by Hand and Machinery

  from "The Manufacturer and Builder"  November, 1889 


    But few tools can lay claim to as great antiquity as the file.  So very old is it, indeed, that no mention can be found in either profane or sacred history of its invention, for it antedates written history; but in the Bible, in second Samuel, the thirteenth chapter and the twenty-first verse, is to be found the following: "Yet they had a file for the maddocks, and for the colters, and for the forks, and for the axes, and to sharpen the goads."  This was 1093 years before the advent of the Christian era, and there is every reason to believe that the file was in use before this time.  Certain it is, that from that time on, there are numerous proofs to show that the file became more and more in general use as the years went on.  In the sixteenth century it had become so common that all reference to it was a purely matter-of-fact way, as when Burnett, in his "History of the Reformation," describing how Sir Edward Grimston escaped from prison, thought it only necessary to say that the cell bars were cut apart with a file.  It has only been within the past quarter of a century that there have been placed in operation any marked improvements in the process of manufacturing files; and even yet there are many mechanics who still insist that files made by the methods of a century ago are superior to those made by the more modern methods of machinery.  Up to within late years this opinion has had all points of fact in its favor, and even now it may have some.  A description of the two processes - that is, hand and machinery, will, therefore, be of interest.

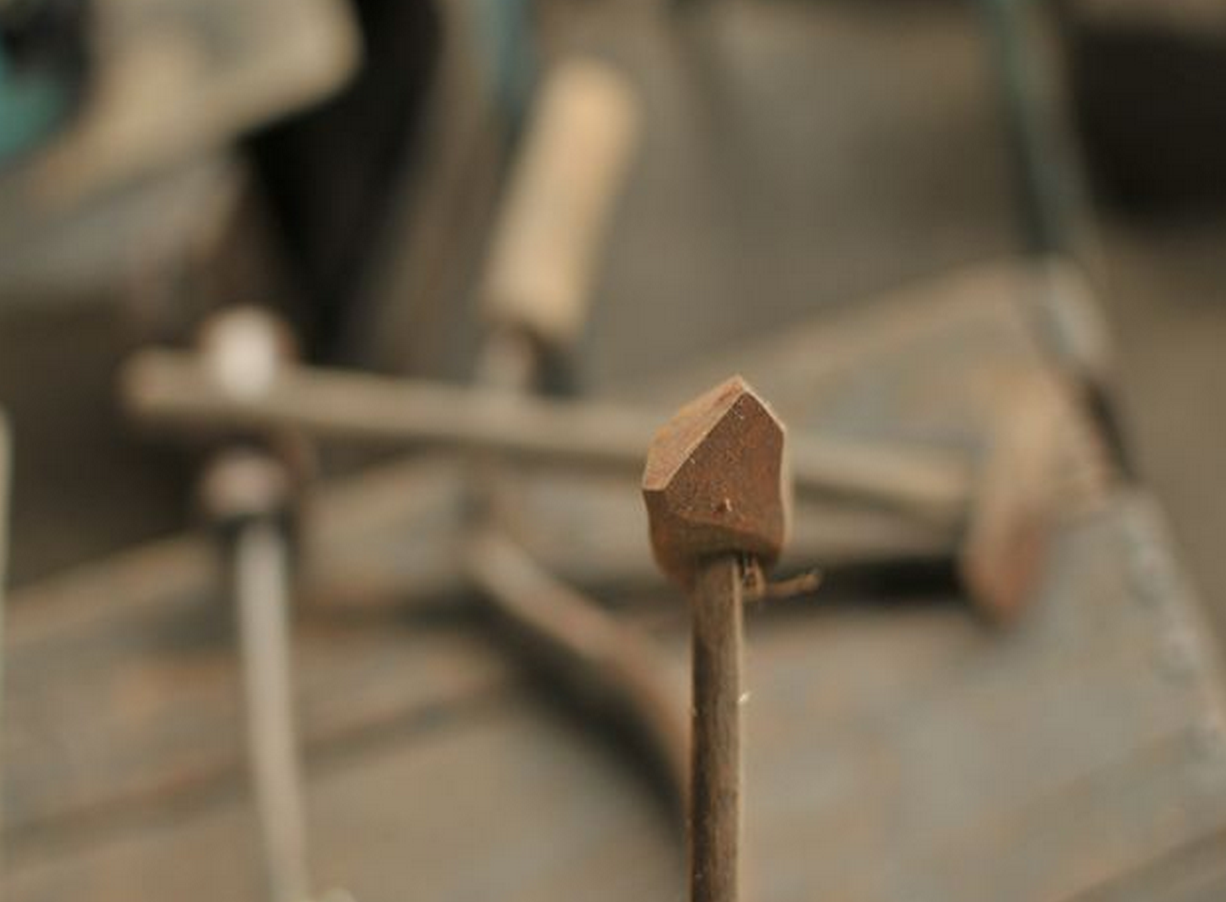
     Take the former, or hand process, to begin with. The steel is first rolled, or tilted, into bars of a size as nearly as possible to the sections required.  The sections bring to the steel in the rough, which are cut from the bar into about the length and diameter of the file required.  They are then annealed with great care by placing them in annealing ovens heated by charcoal, coke or anthracite coal, until they are of a cherry red, and then allowed to cool gradually.  This sufficiently softens them for the chisel cutting, but very frequently after being taken out of the oven it is found that the heat has bent or warped them.  Should this be the case, they are forged into shape again.  They are now filed or ground, the grinding being done on a huge stone, six feet in diameter, the workman sitting almost astride of it and holding the steel directly on the stone with both hands.  In olden times, and even in years not long past, this was a dangerous process, as the stone would sometimes break while in motion, with fatal results to the workman.  These accidents are rare in this country, owing both to the care exercised by the grinders and the superiority of the stone used.  After the blanks are ground, they are "stripped" - that is, they are filed down to the true surface to remove all irregularities.  They are now ready for the cutter, who sits astride a bench in front of the block or anvil, across which rests the file.  It is held firmly in place by a strap across either end, into the lower loops of which are placed the cutter's feet, like stirrups, the weight of the legs thus firmly holding the bar in place.  The tang ( the part to be inserted into the handle ) points toward him, and, after slightly greasing the "blank," he is ready to cut the teeth.  In his left hand he holds a small chisel, the edge of which always exceeds the width of the file, and placing it on the "blank," with an inclination of from 40 degrees to 55 degrees, according to the character of the file to be made, he gives it a sharp blow with the hammer in his right hand.  An indentation in the farthest or small end of the file in thus made, the indentation naturally inclining toward him.  This, of course, leaves a ridge, or a tooth, slightly thrown up above the surface, and, following this as a guide, he places his chisel alongside of it and strikes another blow with his hammer, and this is continued until the teeth are cut the full length of the face of the blank.

     An average workman will strike from sixty to eighty of these blows per minute.  All this time the file is resting on a thin sheet of pewter, or a bed of pewter and lead mixed together, so that the opposite side of the file will not be injured.  In cutting round, or half-round files, the indentations are made very narrow, say about one-tenth of the circumference, and run in a straight line from point to tang.   Then the next indentations are cut in the same way, but shaped differently, the chisel being applied as a tangent to the curve.  In cutting cross teeth, the same methods are followed - that is, indentations are made over indentations.

     The files are now ready for tempering, or hardening.  They are first covered with a paste, made of powdered cows' hoof and other material, to protect them from damage while heating, and are then heated to a red heat in molten lead, which gives them a perfect, even temperature, and plunged into strong brine.  From the latter they are removed before they are entirely cold, so that they can be straightened if necessary.  Following this, they are treated in a muriatic acid bath and then a lime-water bath, the first to remove all oxides and surface dirt, the latter to remove the acid.  The tangs are then softened, after which they are brushed with oil, and they are ready for packing.

     Two hundred years ago attempts were made to cut files by machinery, but with no encouragement until about 1858.  Less than thirty years ago a company, with immense capital, was organized in Birmingham, England, to operate the file-cutting machinery invented by E. Bernot, a Frenchman, but the effort soon proved a failure.  The same result followed the Prestons, of Manchester, Eng., and the British Patent Hardware Company, of the same place, the machinery of the latter being the invention of an American.  Numerous attempts were also made in Sheffield, Eng., but partially owing to imperfections in the cutting machines, and the opposition of workmen to machinery of any shape or form, the efforts proved abortive.  France had also had her file-cutting by machinery enterprises with more or less success.  This country, however, was more fortunate in this regard, and is quoted in the "Encyclopedia Britannica" as the first nation ever clearly to demonstrate that perfect files could be made by machinery.

     In the fifties, the American File Works made files by machinery, at Ramapo, N.Y. but only remained in business for a few years.  An attempt of the same kind in Hartford, Conn., in about 1857, did not succeed.  Then closely followed the Whipple File Works, of Ballard Vale, Mass., in 1858, the Weed File Company, and others.

     The most successful was the Nicholson File Company, of Providence, R. I., which was organized in the spring of 1865, with W. T. Nicholson, the inventor of their machinery, at its head.  The substantial brick buildings were planned to admit of enlargement from time to time, as might be required.  One of the first steps taken was to ascertain what had been done, not only in America, but in the old country, both in files and steel, and to this end their agent spent several months in Europe, with full instructions to purchase such machinery as might be thought worthy of adoption.  These works now turn upwards of 1,500 dozen files per day, and their success is absolute proof of the merits of the machine-cut file.  The machinery used by this firm is so arranged that it will produce a file with teeth, in their spaces, conforming to the hand-cut file.  The article produced, the company saw fit to call the "increment cut file," the word "increment" meaning increase.  These files are not cut a uniform depth or space, and no two spaces can be found exactly alike in the entire length of the side.

     A file machine, it should be understood, is a machine that moves a "blank" quickly upon a bed, with a chisel rapidly falling upon the blank as it moves, and making teeth or indentations.  The clearest description that could be given of it, is that it is hand-work operated by machinery, for one hand of the machine slides the blank along, while the other sets the chisel and strikes the blow with the hammer.  The objection to machine work, however, by those who claim to entertain any objection, is that it is so accurate that the teeth are cut regularly in rows, and of a uniform depth, a thing to be avoided in making a perfect file.  In making them by hand, however, this accuracy or regularity, could not be obtained by the most skilled workman, even if it was desirable, for the force of his blows cannot always be the same, nor can he always place his chisel exactly in the same position.

     In speaking of the variance between their increment files and files with the regularly cut teeth, the Nicholson File Company very clearly explain by saying that the difference between this and the perfect regularity of the old machine-makes must be apparent, particularly in the double-cut files, as in the one case the files cut with such extreme regularity, when put in use, will in the first inch of its movement produce channels or grooves, and the grooves will continue to be made deeper as the file shoved along, thus producing that "grooving" and "chattering" so often complained of, while in the "increment-cut file" the grooves made by the movement of the file for the first inch will have their sides cut away as the file is moved toward the "tang" or handle, and vice versa ; and while it is cutting as fast as it's points will permit, it is also said to cut smoother than the best hand-cut of the same coarseness.  The irregularity spoken of consists not only in the spaces between each tooth, but also in the heights of the teeth themselves, thereby completely removing the objections hitherto argued against machine files.

     Rasps are also made both by machinery and by hand, the chisel for making them however, being in the form of a three-cornered or triangular punch.  The other processes are precisely as in file-making.

    Notwithstanding the great number of files made in this country, a file is often made over, or sharpened- as often as three or four times, many small concerns doing nothing but this.  The word "sharpen" in this case is misleading, for in reality the old teeth are ground off and new teeth chiseled in.


Friday, January 9, 2015

Correct me if I'm wrong — straightenin a one dimensional saw

This comes after some really good explanation Jason gave me and hope he agrees to publish  here. 

Today, I will be focusing on the firsts statements of Mark's instruction to straighten a blade:

1) work from both sides

2) work by halves - sneak up on straight little by little

3) don't focus on a couple square centimeters

Again, enters physicist mind. First, let's assume we have a one dimensional saw, not too useful in the real world but works for illustrative purposes. That's a line. Second, assume that the length of the saw is not affected by the straightening process. This seems sounded to me, but it just an assumption.

Figure 1 shows several lines that have the same length, doesn't look like but they are. Or I say they are and you just trust, ok? If you remember from calculus 1 the length of a curve is given by the integral of the square root of 1 plus the square of the derivative. Wiki it if you forgot it or never had calculus. If you don't like math to the kitchen and grab a rope, then do the experiment yourself. 


Fig. 1: Several same length curves.
Looking nice, isn't it? That's my theoretical saw for different amounts of hammering.  Let me take a look step by step.

First, you start with a bump in you saw:

Fig.2 Initial bump

You hammer it from the top, say at the right of the peak. With that, you reduce the bump but create waves:

After one hit

Now to fix this you need to hammer from both faces (up and down), and you need a few more hits, from both sides (left and right). Eventually you end up with something like this:

few hits later

Great, the bump is gone but now the waves are all over the place. So you see, you cannot focus on 2cm only, you need to look at the whole saw.

If you keep on hammering, side by side, and from the left and right of the original bump, eventually you end up with something much more similar to a straight saw.

final "straight" 1-d saw

Now, in 2D this will be the same but the waves will spread radially from the original bump and they will interact, so you need to consider that to attain a global straight saw.

The previous reasoning has to hold true if there is no substantial elongation of the saw when hammering it cold, and it's independent of how you do the hammering, this is only a geometrical characteristic of the material. To say it in another way, I have no idea how to do it, but I know that if I can make it, something along these lines needs to happen.

The next step would be to properly understand how and where to hit the blade in order to obtain the desired deformation and how the properties of the hammer and the anvil influence this. Once you understand that, you can make a plan.

That's it, does it make sense?


Wednesday, January 7, 2015

Hard work hardening

My last chilean girlfriend made her thesis on dislocation theory. I never thought I would actually use that. She asked me once about tensors and we almost break up. She said I'm a bad teacher. My wife would agree on that. Also my phd student. 

So don't complain I didn't if this doesn't make any sense.

In one of Mark's comments, he explains the reason for "ploughing" and "brushing" (sen and miyagi in japanese) the blade:

"The reason this is done, is friction in use is reduced, and this (and the process of setting) work hardens just the surface, which means the burr breaks away with less ductile bending - more like glass - just where a cutting edge is created, sharper and longer wearing, yet still easily sculpted to correct shape." 

Enters scientific mind. From wiki:

Work hardening, also known as strain hardening or cold working, is the strengthening of a metal by plastic deformation. This strengthening occurs because of dislocation movements and dislocation generation within the crystal structure of the material. Many non-brittle metals with a reasonably high melting point as well as several polymers can be strengthened in this fashion. Alloys not amenable to heat treatment, including low-carbon steel, are often work-hardened. Some materials cannot be work-hardened at low temperatures, such as indium, however others can only be strengthened via work hardening, such as pure copper and aluminum.

Dislocations are defects in the crystalline structure of the material.  They are the first to move/appear when you strain it. If you have a perfectly ordered crystal and you strain it, it will first develop dislocations, and then it will break. If you create enough dislocations the metal will be harder.

Increase in the number of dislocations is a quantification of work hardening. Plastic deformation occurs as a consequence of work being done on a material; energy is added to the material. In addition, the energy is almost always applied fast enough and in large enough magnitude to not only move existing dislocations, but also to produce a great number of new dislocations by jarring or working the material sufficiently enough.

 This is the key to the hard work of work hardening. The yield stress increases as the root of the number of dislocations, so if you want a 4 times harder material you need 16 times more dislocations. Assume that the number of dislocations is a linear function of the time you work the material and you get the idea of how much you need to work to get a saw ten times better.

Figure 1: The yield stress of an ordered material has a half-root dependency on the number of dislocations present.

Now, how do you work harden the material? Wiki lists two of our interest: shaving and burnishing.
The shaving process is a finishing operation where a small amount of metal is sheared away from an already blanked part. Its main purpose is to obtain better dimensional accuracy, but secondary purposes include squaring the edge and smoothing the edge. Blanked parts can be shaved to an accuracy of up to 0.025 mm (0.001 in)
and
Burnishing is the plastic deformation of a surface due to sliding contact with another object. Visually, burnishing smears the texture of a rough surface and makes it shinier. Burnishing may occur on any sliding surface if the contact stress locally exceeds the yield strength of the material.
The shaving I can manage with a file, but it would be nicer to have a proper sen. I need to find out how to best do the burnishing.  And this is beautiful. First you make furrows on the steel (Remember that poem of Hölderlin "Es brauchet aber Stiche der Fels/ Und Furchen die Erd"?) that then will be burnished. You need to make furrows since otherwise you don't have enough force to exceed the yield stress of the material. This really shows a deep, almost poetic, understanding of steel by the japanese blacksmiths.

Western jewellers also know about this btw: "jewellers will construct structurally sound rings and other wearable objects (especially those worn on the hands) that require much more durability (than earrings for example) by utilising a material's ability to be work hardened. While casting rings is done for a number of economical reasons (saving a great deal of time and cost of labor), a master jeweller may utilise the ability of a material to be work hardened and apply some combination of cold forming techniques during the production of a piece."

Now, the most interesting part for me comes here:
The increase in strength due to strain hardening is comparable to that of heat treating. Therefore, it is sometimes more economical to cold work a less costly and weaker metal than to hot work a more expensive metal that can be heat treated, especially if precision or a fine surface finish is required as well. The cold working process also reduces waste as compared to machining. (My emphasis.)
So, you remember those lovely lamination lines from your favourite chisel? A good work hardened saw is the same, but you have just one metal. When you work on the surface you are actually creating a "hard steel back" and a soft core, all without welding, without heat. Furthermore, "During cold working the part undergoes work hardening and the microstructure deforms to follow the contours of the part surface. Unlike hot working, the inclusions and grains distort to follow the contour of the surface, resulting in anisotropic engineering properties." Chupate esa mandarina, as Redoles would say.

This reminds me of Bolaño. Roberto Bolaño is probably the greatest writer that south america has produced since Borges. He always talks about these young guys walking next to the abyss. One false step and you die, literally. Poetry lives there, walking next to it but without falling. A perfect saw would be something like that. Bring the steel to the edge of its properties, just before it breaks it's at its best. Make the teeth as long as possible, the surface as brittle as possible and tension the blade as much as you can.  This will bring you just a little bit closer to the edge, but god knows it's worth it.


De nuestro servicio de utilidad publica

That was the title of some TV segment they showed when I was a child. Like public service, I don't know the english term. (Or maybe you don't have it since there is no such thing as society, there are individual men and women, and there are families.) Whatever.

I just wanted to share some news and point towards the new directions that this year will bring.

First and foremost, Mark Grable has left some very very interesting comments and I will be realigning the practice accordingly. There is plenty I want to try but it will take some time since we are in preparation for the moving. I got myself a box to put my tools:


I thought it was too small (well, it actually is, doesn't fit the large saws) but once you fill it with stone, steel and japanese oak, boy it gets heavy quite fast.  Half of my planes are not there. I really don't know how many I will be able to take at the end... anyway I need to move or ship them to Germany, they will not stay in Austria.

Next to the box you can see my makeshift sendai. Will be working on that too, I need to increase the angle of it. And put some kind of seat, at the moment is slightly too sexual to sit on it.

Second, I need a place to store the japanese websites I find concerning saw making/sharpening. I have a mess in my computer full of open tabs of stuff I found and have no idea how to find again.

Example one, a smithy. The idea is put the picture and invent the caption. Here's the link http://ameblo.jp/yariganna/theme6-10042138655.html

Rough material for cheap saws. They are cut to size and welded to the tang.


Tools of the trade. What's the yariganna-like tool in the middle?


Funny guy with funny shirt pretending to forge weld a cold piece of steel.


Check the size of the forge. I will be making one like that in Chile. I need to find an anvil.


The sen of the trade. The small tool, second from the left, is for miyagi, brushing the ploughs left by the different sen. I need to see one of those first hand. Look at the crazy hammer on the right.


 Close up. Man I want one like that.


Finally a metal cutter. This I got in Chile.  My dad used to have a side job making signs for construction jobs, so we have a big metal shear in the house. It even looks better than this one. I want to make a whalenokogiri.


Finally, starting this year Murakami, the guy behind sakura pink in ebay, is offering to deal for you in the japanese yahoo auctions. That's crazy. The prices in japan of tools is like 1/3 of the ebay price, which after all the fees for moving money in japan (no wonder the economy is stuck) comes to 2/3 or 5/6 of it. However, there is an infinite amount of stuff that will never or very seldom arrives to ebay. What's cool for me is that you can find cheap old saw files — I guess that with ten boxes I will be set for a few years.

You can find the info here: http://rk-trading.ocnk.net/page/18

Please don't get too addicted and I accept no liability for any divorce resulting from over use of this service.

Here a few pics of stuff laying around the yahoo auction sites:

 Whalenoko
 Zenchuona
 Stonystones

To not to talk about the literally hundred of saws that go for 1000 yen or so. I guess this is the most you can get without going to Kyoto flea market yourself. (Which actually, if you bring something like 100 saws and the like, would pay by itself. I know, I'm thinking of it quite seriously.)

So, the workbench is gone, the desk is planed and sanded ready to be sold, bike is fixed and online and the tool selection is almost complete. The bed and our night table have a new owner who's taking them in March. Julia painted my workspace yesterday and the weekend we hope to finish the living room. Moving is some of the most stressing things in life, and planning with plenty of time is the only way to avoid stress and near death experiences the last week you are here. It doesn't get easy, but you can divide the whole process in smaller annoying tasks that don't wear you as much. (Did I say we are moving by public transport, didn't I? Maybe with some help from the postal service. It's 12 hours of train so you don't want to carry too much stuff.)

That's it.