Tuesday, September 29, 2015

Videoing

This is how the blade from yesterday looks after a bit of uradashi:


the edge is still a tad rusty, needs more work but I'm waiting for my new stones to arrive tomorrow to finish it.


 I also need to get rid of that chip


And on this side there is another slight hollow near the edge.

But the video: here it is. If you suffer too much just let me know and go back to old good writing and pictures.


Monday, September 28, 2015

Making the bed and closing mouths

Monday at the bench.

Opa und Oma are on vacations in Turkey so I can squat the front bench and play there. I continue fixing planes for the class/demonstration next month, I want to have 4 planes working as perfect as possible, I will even do a proper sole conditioning of them, to see if I can reach 10 microns (my minimum is 20-25 at the moment).

This are the 3 girls I'm working with at the moment. The one on the left is NOS and arrived today in the mail. Middle you saw yesterday and the right is a cheapo plane I got from Junji. Has a crap chipbreaker but the steel and wrought iron are quite sweet.


I bought the plane for this picture:


A big chip like I like em. Big chips = hard steel, small chips = western cutlery.

What I wanted to highlight today of the other two nice planes is the amount of work it goes to them. The NOS has a beautiful (hand made?) ura, I'm assuming those are sen marks. They go vertical and horizontal but I guess you cannot see those well in the picture.


Then the finish of the soft iron. Lovely chisel work on the surface.


 The blade from yesterday also seems to have sen marks on the ura.


 Why I tell you this? So you can get a nice blade and enjoy life as much as I do.

Now the other side. I spent a good 5 hours making the bed of the new plane and arrived at this:


I love this dai. Seems lighter than the other planes albeit is larger. Murakami told me that the weight of the dai depends on how you dry the wood, but he didn't say which one is lighter, if the kiln dried or the air dried. Anyway, this dai is light and has a beautiful straight grain.

So my other planes don't feel jealous I closed their mouths.


With a piece of rosewood and lots of 5 seconds glue. The other plane didn't have such a perfect match so I put more glue on the gap and later I sand it. (Yes, I do use a grinder on japanese blades. I needed to do a lot of uradashi on this blade and grind off the chip.)


here you can see it better


This is the glue Julia's mother uses, can you get this in Holland Don? Way better than the epoxy we tried last time.


The mouth is not as tight as in the new plane but it works nice enough.


 Another thing to note: the convex sharpening of the blade. This one comes from the blacksmith I think, you can still see marks of maybe a belt sander on the bevel but at the edge becomes highly polished and a tad convex. I haven't sharpened this one yet, first I'm fixing the dai.

And finally, this came together with the new plane I got:


It's a line holder with two nails. One in the pin and one in the holder. I used a line to check for straightness of the long beams in Valparaiso and I was missing something like this, now just to get an ink marker, the square, and good to go.

Saturday, September 26, 2015

Review and show off

Arrived to Germany 2 days ago, stayed at hannover for a bit, and today finally to Celle to see a half broken grandmother (she fell on the street) and a sad Opa. Life sucks when you grow old it seems.

But the tools... I ordered a few things from Japan before coming here and they are almost all here. 40 files we bought with Jason and Mark, a plane blade, a few things from Junji that I ordered before leaving europe last time. Three other packages are on its way with 2 planes, a hammer and 2 kitchen knives. Some sweet ass shit so start wetting your mouth.

Before that though, the shinglemaker had the genius idea of enslaving me for some sharpening class/demonstration:

http://www.woodworking.nl/showthread.php?15417-Japanse-Zaag-Slijpen-Demonstratie-Cursus

If you are from Holland but cannot make it the 31st of October and would like to meet, I will be in Enschede and Amsterdam before that, so drop me a line if you are in the mood for sharpening.

Now the sweets:


I finally feel like my friend from Ariari, well, with 1/10th of his skill and coolness that is.

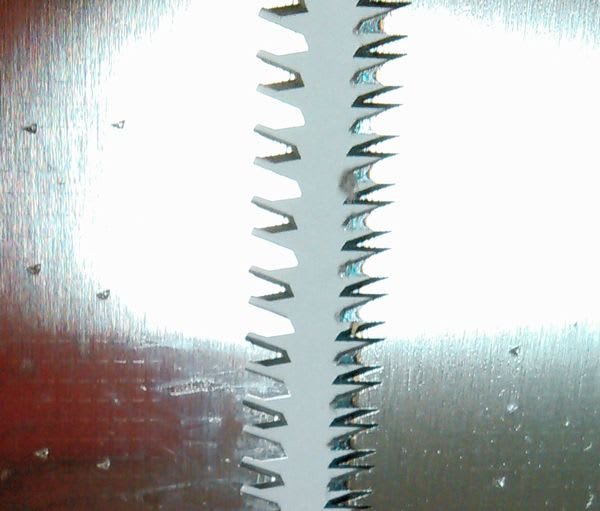
Oh, you don't know who ariari is? Ariari is kioto master carpenter with the coolest planes ever. He's also friend with chumasaru and likes to play with cool saws:


Anyone tempted to try this pattern? I haven't got any saws here to try out. I may convert a western saw into japanese geometry soon so maybe I give it a try. What about you Steven? You got plenty of saws to practice and a vice to play with.  Here's the link btw http://blog.goo.ne.jp/ariari_1946/e/75d01c8539fc88421d3d69503a3cb384

Back to my delicious new plane. I saw it and loved it. The proportions of it. I don't remember if I focused on the skin of the blade with the auction pictures but that was the first thing I noticed after seeing it live. The blacksmith worked to a ver final size on the anvil, and you see forge marks everywhere save the sides, ura and bevel. A master's work. 


The curve of the top is particularly lovely. While the back is rough and sex.y


Final one, die of envy. I think I payed 50usd for the blade, the dai was here waiting for it.


Anyway. Next surprise of the day was this:


I opened a book and some papers fell.


 A second hand book from amazon, 20eur or so.


 The description didn't say anything about plates, so I want to put them all here for other prospective buyers


 Lots of roofs, joints and geometry


And this is the book: Die Holzkonstructionen. No idea what says inside (there's a lot of text, not jsut nice drawings) but seems like a fucking good buy only to see those plates. A better review when I read it a bit.


And you remember my stair making business?


Exactly. It's explained very simply here:


 With lots of diagrams and a bit of text.


 I could have used this explanation a while ago.


 And Gabe™ bevel gauge in use:


This is one of the books Chris Hall recommends and I can see why. The text is a reprint of an old book with comments and drawings from a more up to date guy, it seems quite useful and a good help for my stupid modern mind that didn't learn geometry in school.

I also ordered the one lost art press re-printed, making windows, doors and stairs, but it doesn't show how to make handrails, just stairs so I didn't pay much attention to it.

Wednesday, September 16, 2015

Stair making II

First lesson: draw the joints between the straight and curved parts before cutting the curves. You need square references surfaces to make that frikin joint. 

Second lesson: making a mock up was a good idea. 

This is how the mock up looks then:


 My eyes finally can rest looking at this, there is a continuous, first derivative continuous curve as I go down the stairs. There's no structural need for this, but it's a cognitive need, to repeat the shape you see in the bottom at mid height.  The cognitive, or maybe emotional need, of seeing continous things. One handrail and not few pieces stuck together.


I didn't consider the half lap joint in that side, so after gluing it the angle on the lower rail had shifted.


Maybe I also need to make the upper rail with the same smooth change of slope as the stair, where it meets the wall? Add a scroll to the beginning of the rail? I definitely need to increase the top radius of the rail to match better the volute. I'm using the same profile (kind of) the one there is in the second floor, so don't ask for different shapes and mouldings for this stair. 

I'm leaving it like that, finish it when I come back. Read some books, think a bit more about the drawing. I'm late anyways, a year or more already. I wish my mother could have seen it, and used it once at least but I just didn't have the skills back then. The month I was here last time, when she was dying, I was making my roubo bench too. Didn't finish that one that time either. At least it's glued now. She anyway asked to leave the half finished bench here, in a room so she could go and look at it. 

It's not the best way of making lots of projects but I like it. Projects that last years, and you change through them and they grow old with you. Become part of your life and organise your life so you can finish them. It takes time, and nobody will put up with it except yourself. It's all good. 


Tuesday, September 15, 2015

Neither a bang nor a whimper

They are not the hollow men:


 And this is Luis doing half a splice in the third day of the class (new record):


 Sebastian and Keiran, our resident DJ and bread master


 Alvaro and Hanna, practicing dove(de)tails


 Keiran making the keys of his marimba with an angentinean bodied french plane

 and one coffee table

 And another coffee table. Tea table actually, with some added functionality


I kind of finished the bench the other day, before the start of the class, but I was fighting all the time for them not to use it. A vice makes you saw harder and worse than needed, so indeed it's a vice.


 and as every flat surface, it attracts tools and other objects.


Hanna needs breath more slowly and relax more:


 And Sebastian is a very slow and very detailed worker who didn't believe the wonders of glue (the dry fit was a tad too gappy), he totally got the rhythm right and the joint nice


That was it. 3 days in a row. I spent today like it was sunday, knackered. Eat, lay down, chat with my brother in the living room, write posts. 

If you didn't get the quote, it was the hollow men by ts elliot. This is how the world ends... and the like. The same guy of waste land and how to tell the dancer from the dance. Those were other times. 

I'm leaving this friday to fortress Europe, a Europe of closed borders and austerity. Not the same place I went to 7 seven years ago. I go to pick up a gal, some tools and say goodbye again to a few good friends. My time in Chile comes to an end, but it actually feels like a beginning. This is how a world begins, not with a bang, not a whimper, but with the sound of shavings flying off the kanna, the sound of steel rubbing against wet stone, the soft sound of a saw being properly used. Gentle sounds, living sounds, human sounds. 

I see the pictures again: "Japanese tools collected by a crazy physicist in Graz find new home in Chile," could be a good caption. I'm looking forward to the next class.